Multiple Beams
The properties dialog for multiple beam Antennas, where each beam can have different properties is shown below.
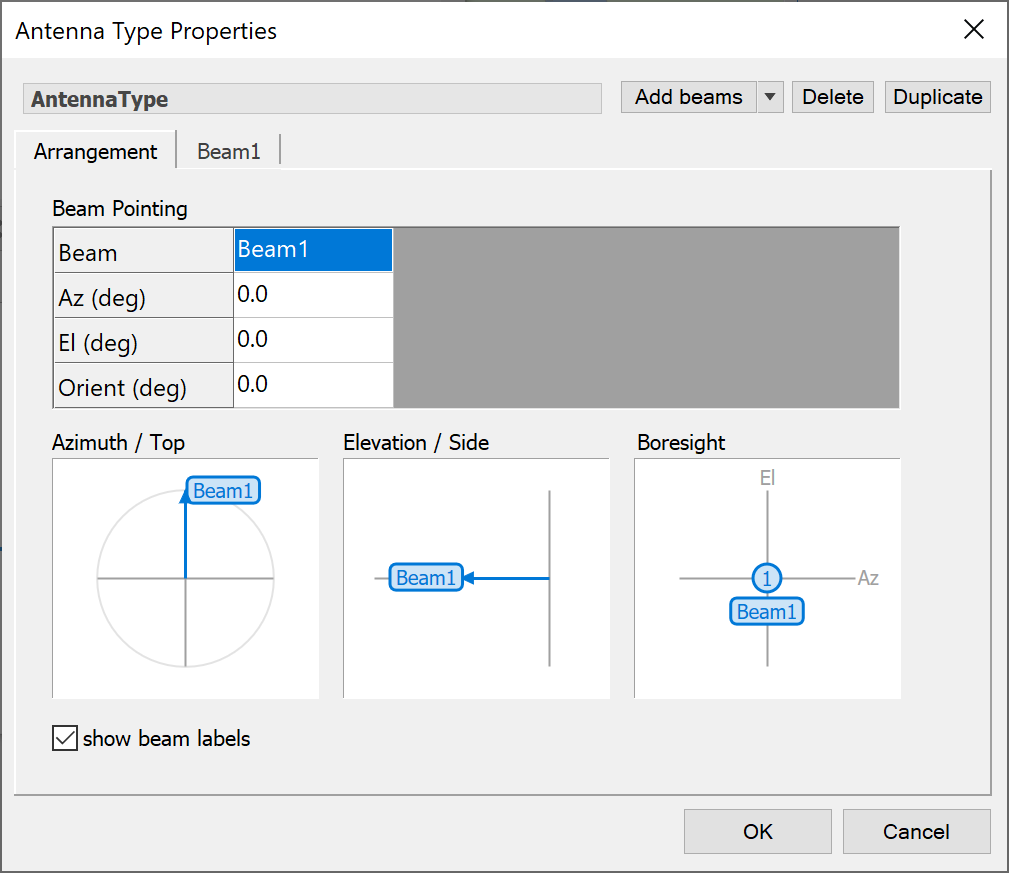
The dialog has multiple tabs. Each beam has its own tab. These tabs contain the same set of controls as a single beam Antenna.
The Arrangement tab is where the layout of the multi-beam structure is determined – here you:
- Define the azimuth and elevation of each beam relative to the antenna boresight,
- Give the orientation of each beam
- Preview the layout from three different perspectives.
Managing Beams
The beam tools, along the top right of the dialog, allow you to change the number of beams on your Antenna. There are buttons for adding, duplicating and deleting beams.
Here is how to add a beam:
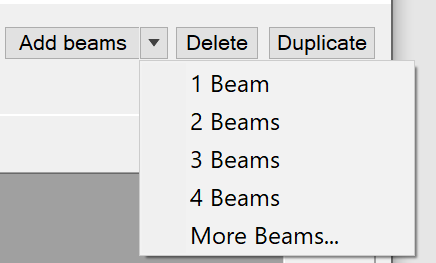
Click the Add button: a pop-up menu will appear. There are options for selecting 1, 2, 3, 4 or more beams.
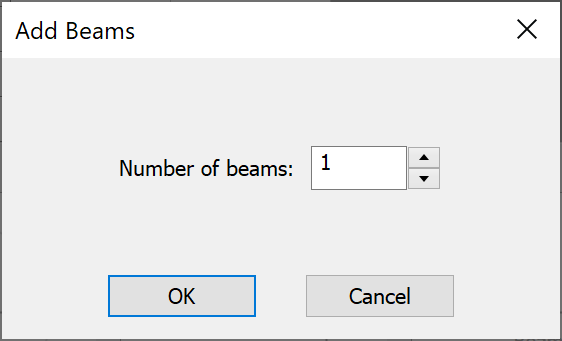
If you select More beams, you will be asked to say how many you want:
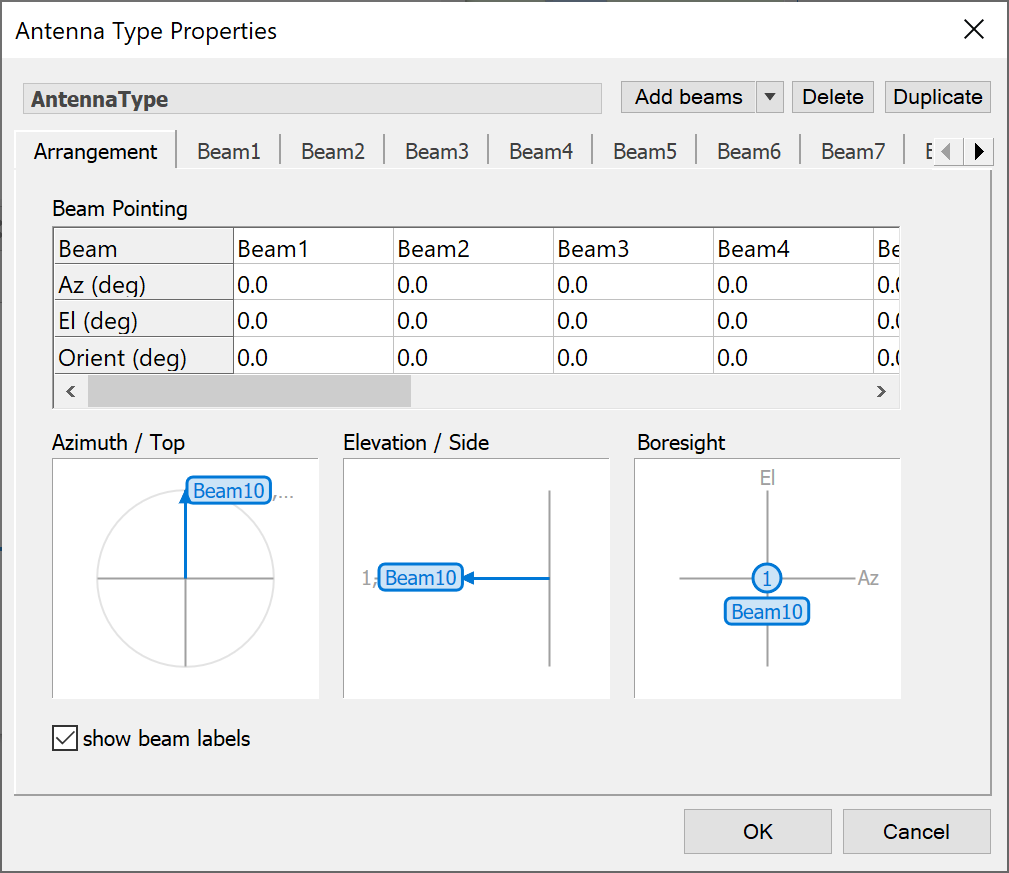
The new beams will appear as extra tabs on the dialog. If there is not enough space to display all the beams, as many beams as possible will be displayed. Two scroll buttons will appear allowing you to scroll through the tabs.
Arranging Beams
The Arrangement tab allows you to organise the beams within your Antenna. By this we mean pointing the beams relative to the mechanical boresight of the Antenna.
At the top of the arrangement tab is a table. This table allows you to set the pointing and the orientation for each beam. By default, all beams are pointed along the boresight of the Antenna. To change any of the entries in the table, simply click in the table and type a new value. You can paste in data if you have the information elsewhere.
The example below shows three beams. Each one is pointing in a different direction relative to the Antenna boresight.
There are three views – the top view (showing the azimuth of each beam), the side view (showing the elevation of each beam) and the boresight view (showing the 3dB contours of each beam viewed from the perspective of the Antenna).
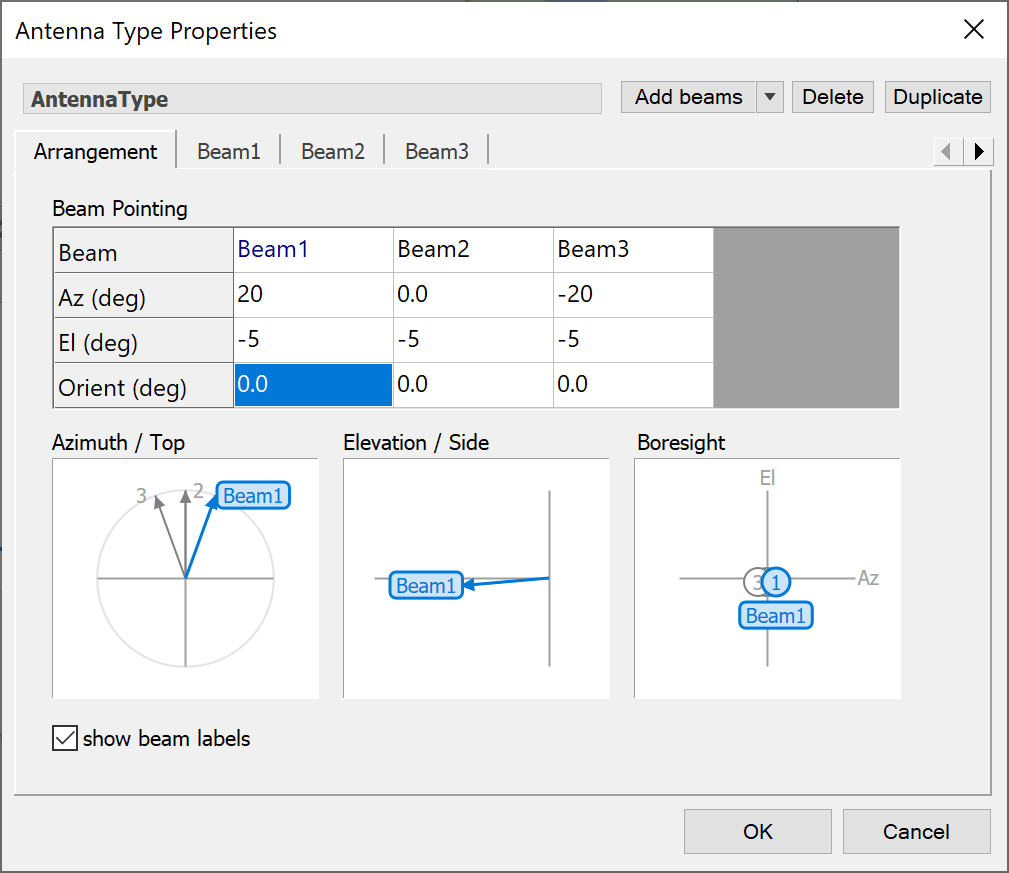
You can choose whether you want the beam labels to be displayed in the preview windows. If more than one beam overlaps exactly in any of the windows, the label of the first beam is shown followed by two dots. This indicates that there is more than one beam represented at that location.
As well as entering the (azimuth, elevation) directly, you can also move the beam pointing by selecting a beam on one of the previews and moving it to a new location.
Beams can be designated as electronically steerable. If this option is selected the beams will be pointed by according to the Link set up. This means that you won’t have to specify any pointing information on the arrangement tab.
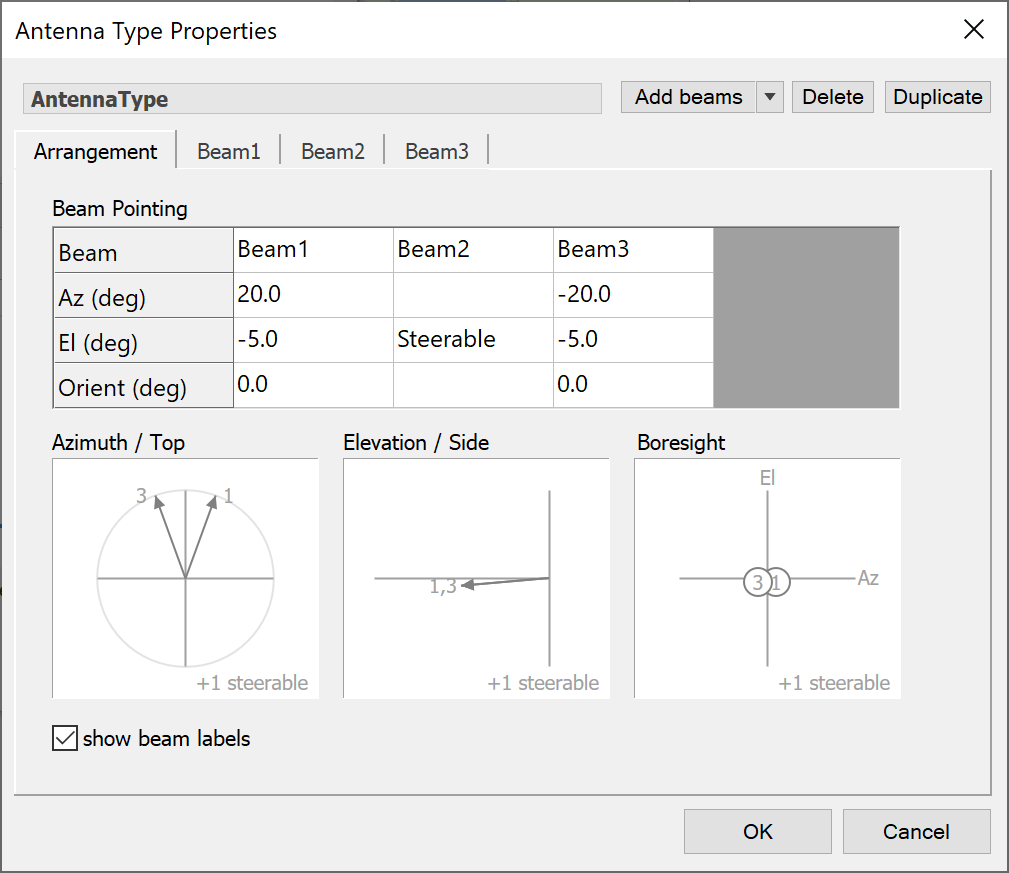
In this example, Beam 2 is steerable and so the pointing options are replaced with text that indicates this. In addition, the beam no longer has a pointing direction in the preview windows. Instead, steerable beams are shown in the bottom-right corner of each preview.
Modifying Beams
When you click in the Beam Pointing table on the Arrangement tab, the corresponding beam name is highlighted in the table. To help with identification, the beam is also highlighted in the preview windows and on the beam tab. If the tab for the beam is not visible it is scrolled into view.
To modify the parameters for a beam, you can either click on the beam tab or you can double click on the beam in one of the preview windows. If you use the double-click option and the beam tab is not visible, it will be scrolled into view and selected.
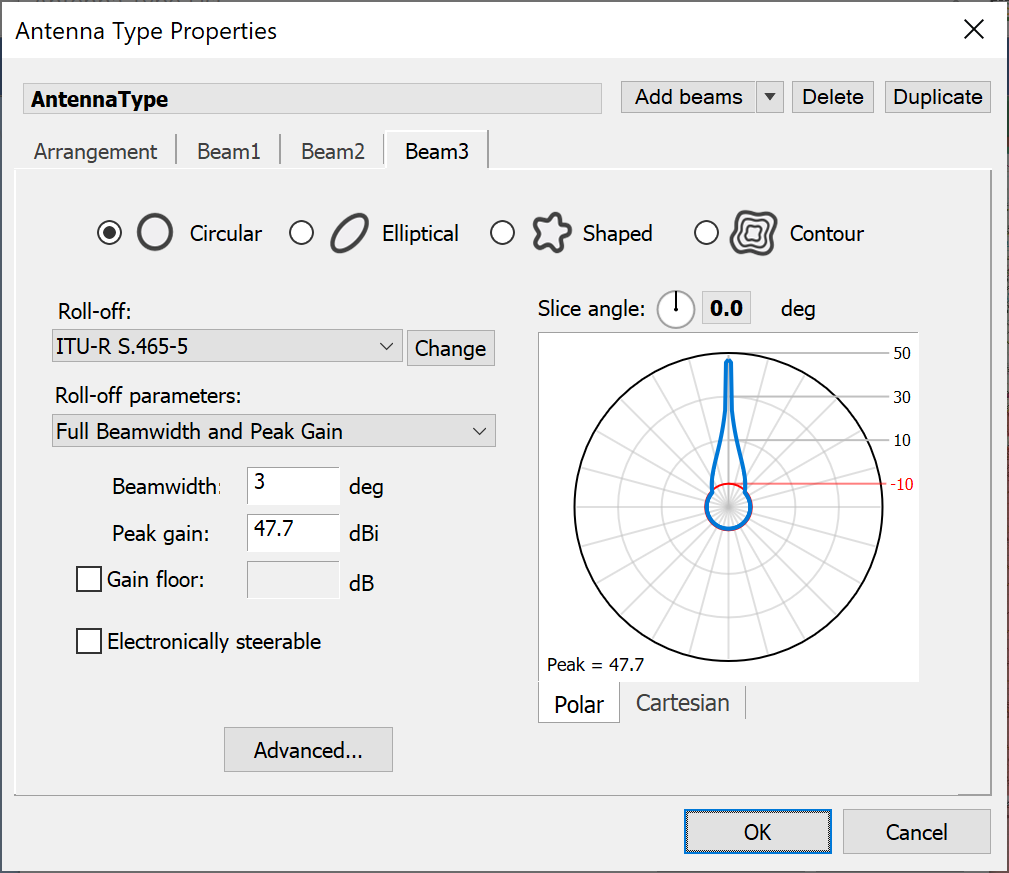
Editing of individual beam properties is exactly the same as for single beam Antennas. However, because this is a multiple beam Antenna, the individual beams can be duplicated and deleted.
Duplicating and Deleting Beams
When a beam has been selected, the duplicate and delete beam buttons become available. To duplicate a beam, click duplicate. A new copy of the beam will be created. The copy will become the selected beam. To create multiple copies, simply keep pressing the duplicate button until the desired number of beams has been created.
To delete the selected beam, click Delete.